I have been looking to do some work with robots and purchased a few different different robot car kits. There are many options available, some have 2 wheels, some have 4 wheels. You can also choose various different options to do all of the work from a Raspberry Pi, Arduino, STM32 and many more.
In this example we will take a basic 4wd smarty car chassis and add some basic parts to it, there will be some code examples demonstrating various functions.
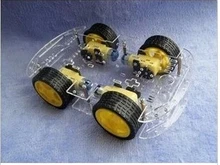
Lets first take a look at a typical smart car chassis, this is a 4 wheel version

As you can see you basically get the frame, motors and wheels and all required screws and nuts and instructions on how to put this all together. there are options which will give you an Arduino, motor driver and various other sensors but this option allows you to build your own spec of car but obviously is a slightly more advanced option
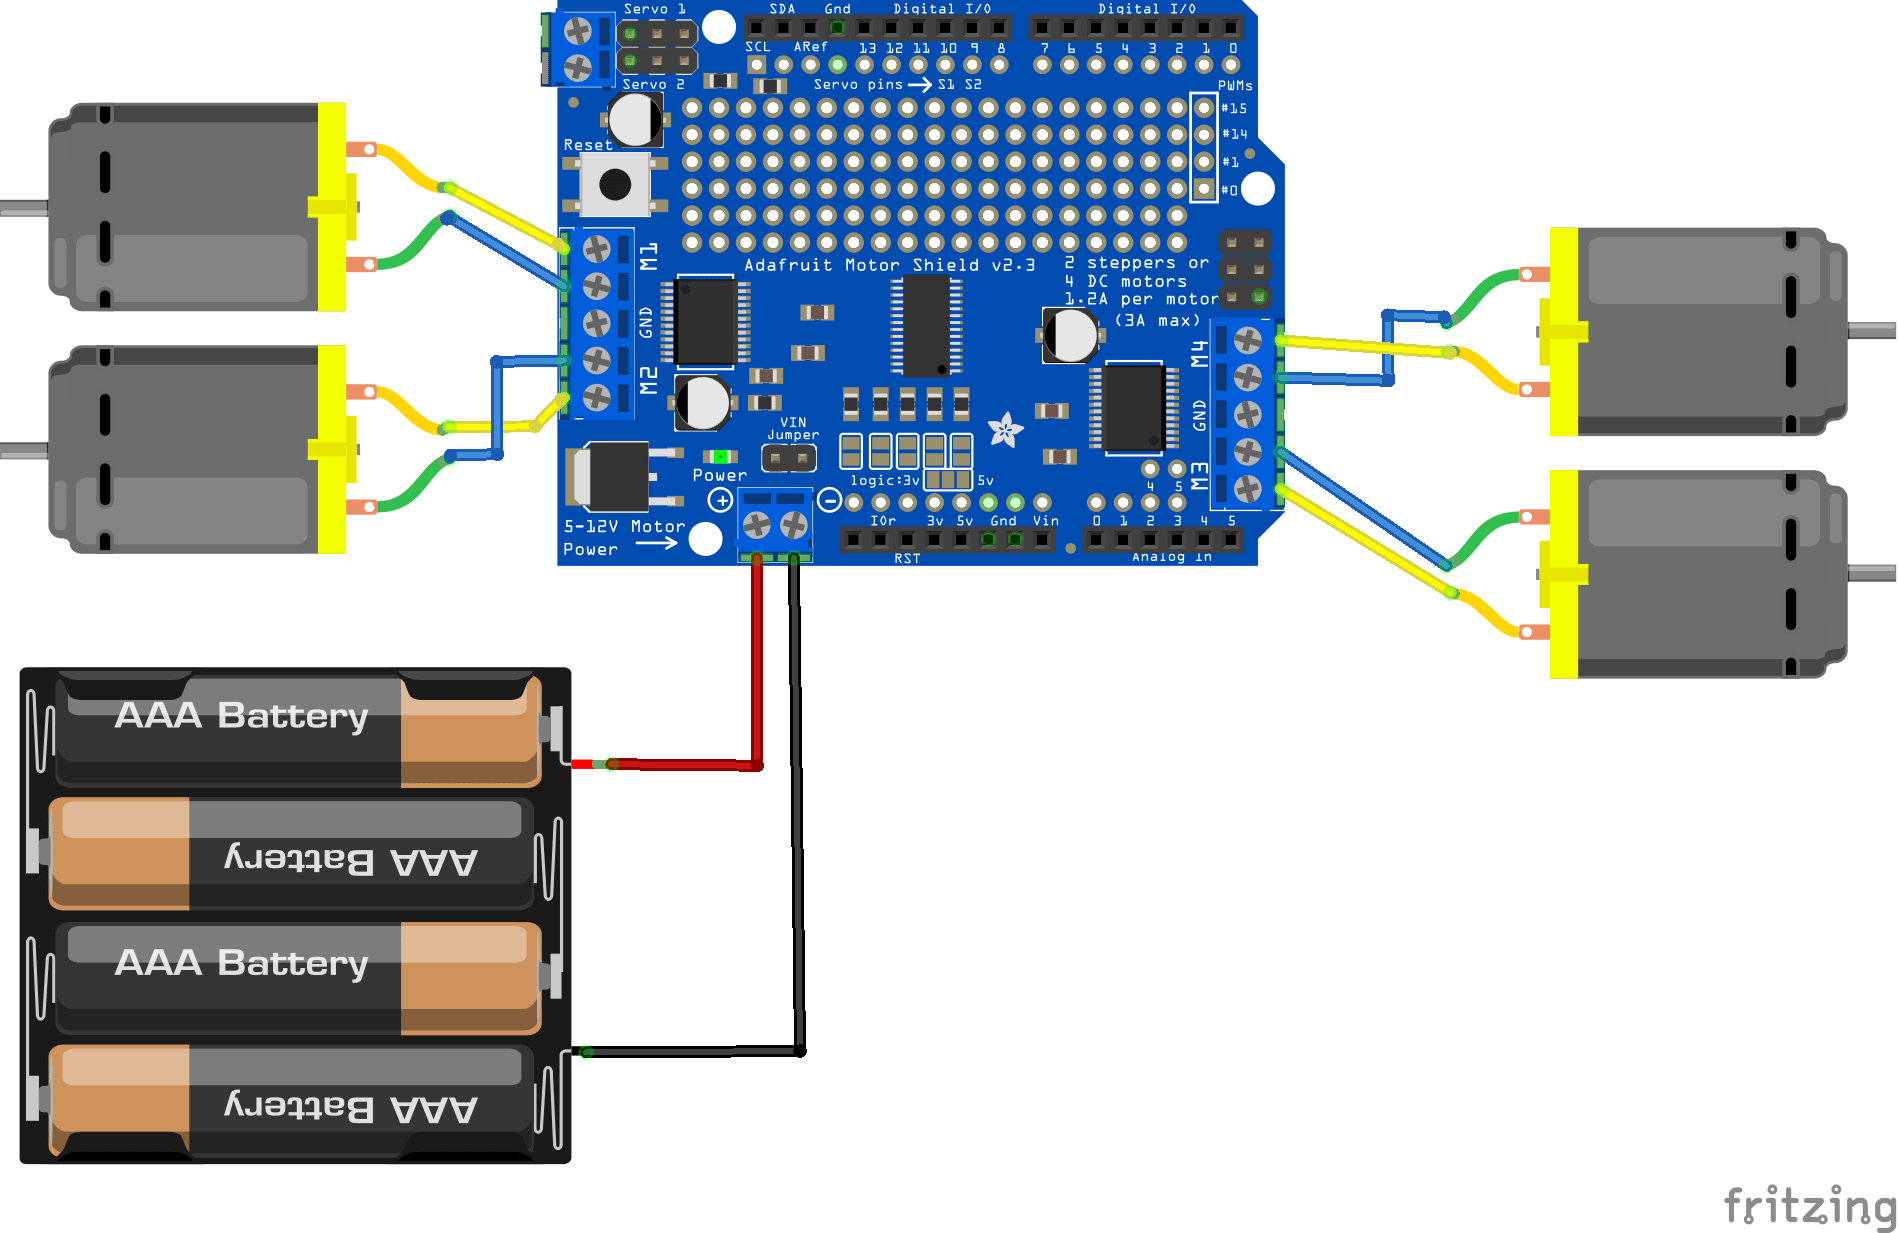
My first decision was to choose how I was going to control and drive the motors, being the DC type and also because there were 4 of them I decided to go with an Arduino Uno and a motor control shield, this is a motor shield

I wired M1 and M2 to the front 2 motors and M3 and M4 to the rear motors.
Layout
This is a basic layout drawn up in fritzing to give you the general idea of what I am building
Code
First of all I needed a simple test program to verify I had wired the motor correctly.
This requires the Adafruit motor library – https://github.com/adafruit/Adafruit-Motor-Shield-library
[codesyntax lang=”cpp”]
#include <AFMotor.h>

AF_DCMotor motor(1, MOTOR12_64KHZ);

void setup() {
  Serial.begin(9600);           // set up Serial library at 9600 bps
  Serial.println("Motor test!");

  motor.setSpeed(200);     // set the speed to 200/255

  Serial.print("forwards");
  motor.run(FORWARD);      // turn it on going forward
  delay(1000);

  Serial.print("backwards");
  motor.run(BACKWARD);      // turn it on going forward
  delay(1000);

  Serial.print("stop");
  motor.run(RELEASE);      // stopped
  delay(1000);
}

void loop() {

}
[/codesyntax]
Now a basic example which will move forward, backwards and stop
[codesyntax lang=”cpp”]
#include <AFMotor.h>

AF_DCMotor motor1(1, MOTOR12_64KHZ); // create motor #1, 64KHz pwm
AF_DCMotor motor2(2, MOTOR12_64KHZ); // create motor #2, 64KHz pwm
AF_DCMotor motor3(3, MOTOR34_1KHZ); // create motor #3, 1KHz pwm
AF_DCMotor motor4(4, MOTOR34_1KHZ); // create motor #4, 1KHz pwm

void setup()
{
  Serial.begin(9600);//set up Serial library at 9600 bps
  Serial.println("Motor test!");
  MotorSpeed(200);
  AllForward();
  delay(1000);
  AllBackward();
  delay(1000);
  AllStop();
  delay(1000);
}

void loop() {

}

void MotorSpeed(int Speed)
{
  motor1.setSpeed(Speed);     // set the speed to 200 (255 max)
  motor2.setSpeed(Speed);
  motor3.setSpeed(Speed);
  motor4.setSpeed(Speed);
}

void AllForward()
{
  Serial.print("forward");
  motor1.run(FORWARD);      // turn it on going forward
  motor2.run(FORWARD);
  motor3.run(FORWARD);
  motor4.run(FORWARD);
}

void AllBackward()
{
  Serial.print("backward");
  motor1.run(BACKWARD);      // turn it on going forward
  motor2.run(BACKWARD);
  motor3.run(BACKWARD);
  motor4.run(BACKWARD);
}

void AllStop()
{
  Serial.print("stop");
  motor1.run(RELEASE);      // turn it on going forward
  motor2.run(RELEASE);
  motor3.run(RELEASE);
  motor4.run(RELEASE);
}
[/codesyntax]
Links
4WD Smart Robot Car Chassis Kits for arduino with Speed Encoder New