In a previous example, we did a basic copy of the Arduino capacitance shield but hey outputting to the Serial Monitor is a bit boring, so how about we pick an LCD or LCD shield to try this out with.
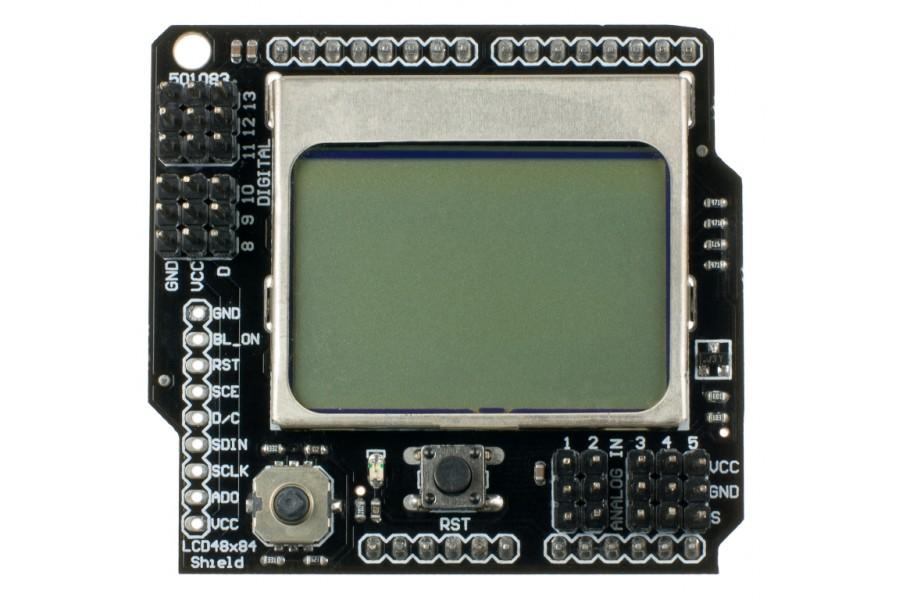
There are a couple of good shields out there using different shields but as a quick example I picked the LCD4884 shield. In case you’ve never heard of this or seen one, it looks like this.
The beauty of this was the existing code would work with an alteration regarding the analog pin used, A0 is used by the shield for the joystick so I simply picked A1 which comes out to a header. The D11 and D13 were available on a header as well, so perfect just a minimal change, which we all like.
Code
This requires the LCD4884 library to be installed, I left the Serial output in but this can easily be removed, its more for debug purposes
[codesyntax lang=”cpp”]
#include "LCD4884.h"

#define analogPin      1
#define chargePin      13
#define dischargePin   11
#define resistorValue  10000.0F

unsigned long startTime;
unsigned long elapsedTime;
float microFarads;
float nanoFarads;
char tempCap[10];

void setup()
{
  pinMode(chargePin, OUTPUT);
  digitalWrite(chargePin, LOW);
  lcd.LCD_init();
  lcd.LCD_clear();
  init_MENU();
  Serial.begin(9600);
}

void init_MENU(void)
{
//clear LCD and display initial display
lcd.LCD_clear();
lcd.LCD_write_string(10, 1, "Capacitance", MENU_HIGHLIGHT );
}

void loop()
{
  digitalWrite(chargePin, HIGH);
  startTime = millis();
  while(analogRead(analogPin) < 648){
  }

  elapsedTime= millis() - startTime;
  microFarads = ((float)elapsedTime / resistorValue) * 1000;
  itoa(microFarads,tempCap,10);
  if (microFarads > 1)
  {
    Serial.print((long)microFarads);
    Serial.println(" microFarads");
    lcd.LCD_write_string(10, 2, tempCap, MENU_NORMAL);
    lcd.LCD_write_string(22, 2, " uF", MENU_NORMAL);
  }

  else{
    nanoFarads = microFarads * 1000.0;
    Serial.print((long)nanoFarads);
    Serial.println(" nanoFarads");
    lcd.LCD_write_string(10, 2, tempCap, MENU_NORMAL);
    lcd.LCD_write_string(22, 2, " nF", MENU_NORMAL);
    delay(500);
  }

  digitalWrite(chargePin, LOW);
  pinMode(dischargePin, OUTPUT);
  digitalWrite(dischargePin, LOW);
  while(analogRead(analogPin) > 0){
  }

  pinMode(dischargePin, INPUT);
}
[/codesyntax]
Results
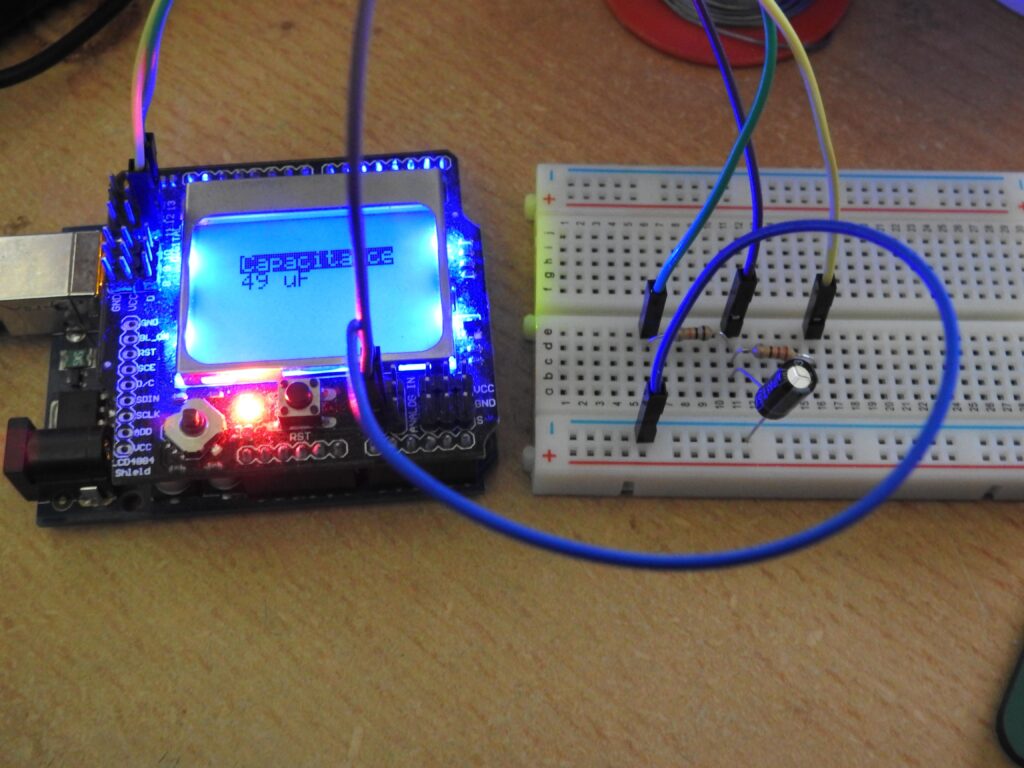
Here is a picture of the project, the capacitor under test was a 47uF type
Links
Graphic LCD4884 Shield for (For Arduino)


