On this page we look at Scratch for Arduino – s4a. We will be using a Keyestudio board which contains a variety of LEDs and analog inputs for testing.
Scratch is a basic environment for learning development, you drag and drop blocks onto the interface to create your ‘program’, if coding is not your thing then this is ideal for simple projects. Its also a nice way to introduce the Arduino to kids without again delving into the more complex programming side of things
First s4a
You need to install the Arduino IDE and upload the firmware – http://s4a.cat/downloads/S4AFirmware16.ino. You then need to download the s4a from http://s4a.cat/ – http://s4a.cat/downloads/S4A16.zip. Extarct the zip file and install s4A
Hardware
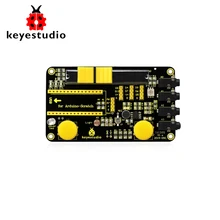
We used a Ks0189 keyestudio Scratch for Arduino Starter Kit which is a neat development board that you can fit an Arduino Nano to. Here is a picture of the board
Here is some blurb regarding the board
keyestudio Robotale Scratch is used with an Arduino Nano. Using the Scratch programming language, you can easily create simple interactive programs with Arduino or create programs based on the input of Arduino from sensors. keyestudio Robotale Scratch incorporates a light sensor, sound sensor, a button and a slider, as well as 4 additional inputs that can sense electrical resistance via cables. Designed for educators and beginners, the keyestudio Robotale Scratch is a good way to get into the very basics of programming and reading sensors.
Examples
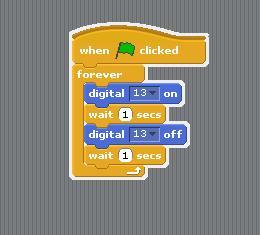
You will need to start s4a and then drag the blocks like the image below to flash the LED connected to D13 on and off
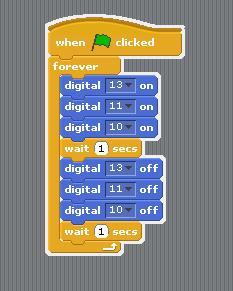
This example will blink all 3 LEDs on and off
Summary
A nice and easy starting block for learning, the board comes in at $12 (you can get a kit for about $20 with the board, Arduino Nano clone, USB cable, mounting board and some analog connectors). This in my opinion is a low cost setup for the young kids to learn about the Arduino and a gentle intro to electronics
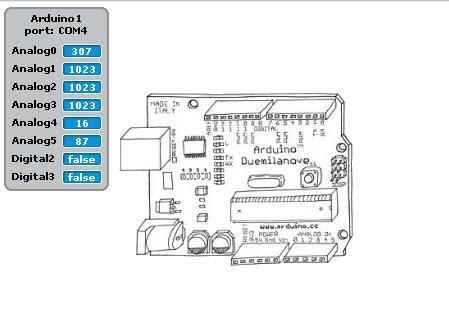
One cool thing about s4a is there a feedback area in the IDE which shows analog pin values and 2 digital values, you can see this here
If you toggle the slider, press the buttons, vary the light and make some noise on the Keyestudio board you will see the values change
Links
Keyestudio Scratch kit for Arduino Starter with Scratch board + PDF datasheet


