I bought a low cost motor shield and a cheap micro servo on ebay, in this example I will show the parts I bought, how to connect them and show some basic code on how to drive the servo.
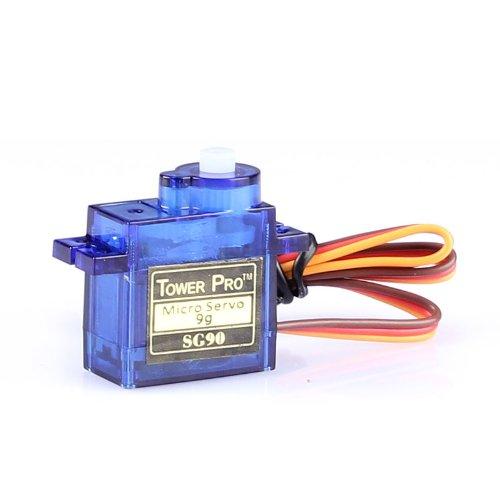
Here is the servo, its a very low cost part. It has three connections and the wire colour is usually as shown in the picture below, after a bit of digging I found that the colours were as follows
Brown -> 5v
Orange -> Gnd
yellow -> Signal
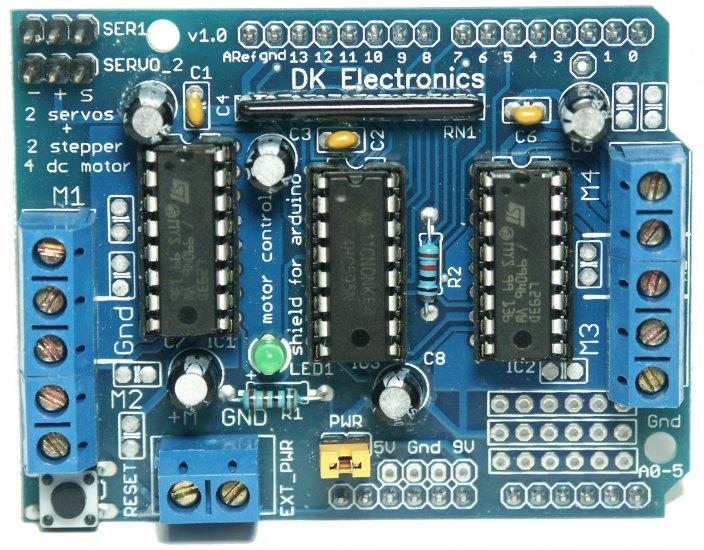
This is the exact motor shield that I purchased, there are a few companies who make clones of this shield but generally they are very similar. I connected the micro servo to Servo_2 in the picture below
Brown to the pin marked –
Orange to the pin marked +
yellow to the pin marked S
Code
The code uses the built in Servo library
[cpp]
#include <Servo.h>
Servo myservo; // create servo object to control a servo
// a maximum of eight servo objects can be created
int pos = 0; // variable to store the servo position
void setup()
{
myservo.attach(9); // attaches the servo on pin 9 to the servo object
}
void loop()
{
for(pos = 0; pos < 180; pos += 1) // goes from 0 degrees to 180 degrees
{ // in steps of 1 degree
myservo.write(pos); // tell servo to go to position in variable ‘pos’
delay(150); // waits 15ms for the servo to reach the position
}
for(pos = 180; pos>=1; pos-=1) // goes from 180 degrees to 0 degrees
{
myservo.write(pos); // tell servo to go to position in variable ‘pos’
delay(150); // waits 15ms for the servo to reach the position
}
}
[/cpp]
Links
L293D Motor Drive Shield for Arduino Duemilanove Mega / UNO
SG90 Tower Pro Micro Servo 4.2-6.0V 10us Dead Band Width for RC Helicopter


