In this example we will connect an LM35 temperature sensor to our Arduino
The LM35 series are precision integrated-circuit temperature sensors, whose output voltage is linearly proportional to the Celsius (Centigrade) temperature. The LM35 thus has an advantage over linear temperature sensors calibrated in Kelvin, as the user is not required to subtract a large constant voltage from its output to obtain convenient Centigrade scaling. The LM35 does not require any external calibration or trimming to provide typical accuracies of ±1/4°C at room temperature and ±3/4°C over a full -55 to +150°C temperature range
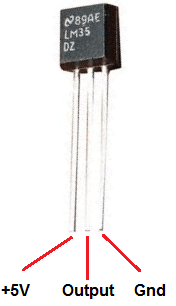
Here is a picture of the pins, its important to get these correct or you can damage the sensor
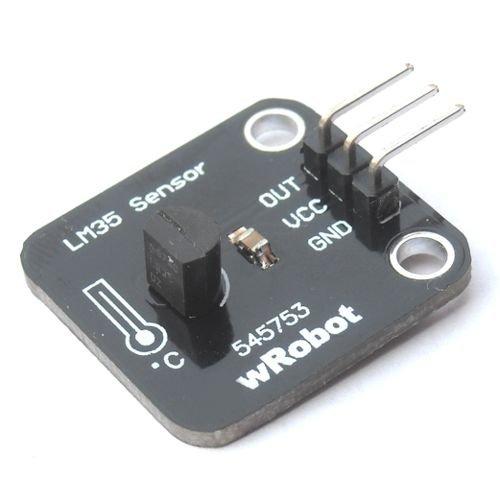
I purchased a small module, which looks like this. This was clearly labelled and helps avoid any mistakes with wiring, I also prefer using cables to modules rather than breadboards
Schematics and Parts
You will need
Arduino Uno
LM35 sensor or module
Hook up wire (dupont cables)
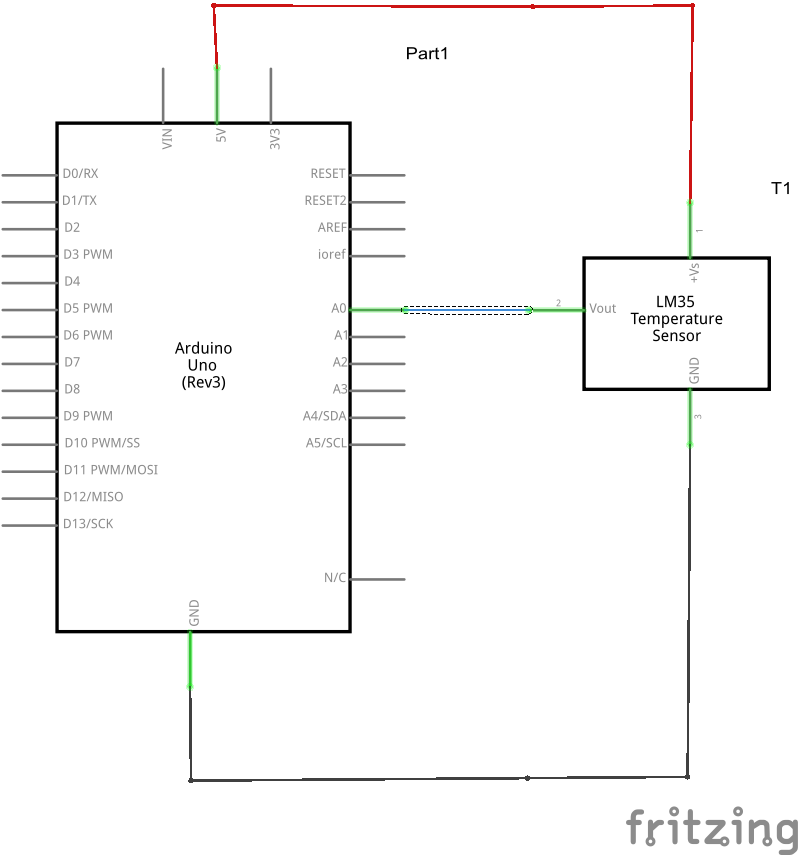
Very simple to connect Vcc is 5v, Gnd is any Gnd and out goes to Arduino A0, you can see this below
Code
[codesyntax lang=”cpp”]
//initializes/defines the output pin of the LM35 temperature sensor
int outputpin= 0;
//this sets the ground pin to LOW and the input voltage pin to high
void setup()
{
Serial.begin(9600);
}

//main loop
void loop()
{
int rawvoltage= analogRead(outputpin);
float millivolts= (rawvoltage/1024.0) * 5000;
float celsius= millivolts/10;
Serial.print(celsius);
Serial.print(" degrees Celsius, ");

Serial.print((celsius * 9)/5 + 32);
Serial.println(" degrees Fahrenheit");
delay(1000);

}
[/codesyntax]
Results
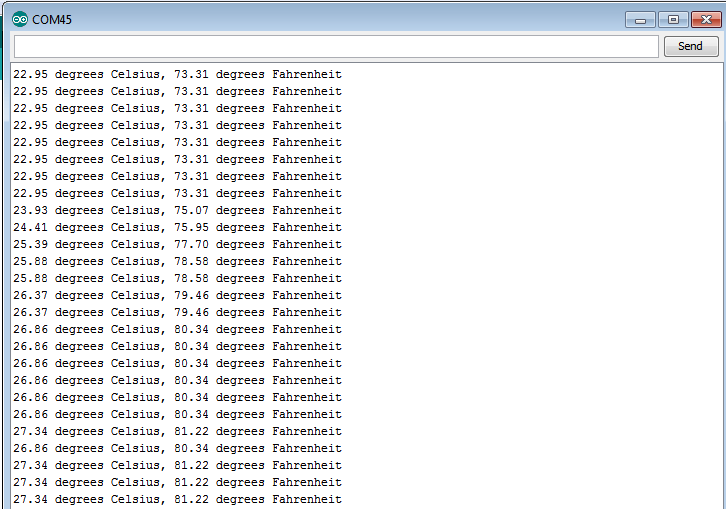
Here are the results via the serial monitor
Links
5PCS LM35D Temperature Sensor TO92 Packing


