Ok, I had heard of Simba OS but hadn’t managed to try it, as quoted “2Simba is an RTOS and build framework. It aims to make embedded programming easy and portable”
Install it
Install Simba in the Arduino IDE 1.6.10+ as a third party board using the Boards Manager.
Open File -> Preferences.
Add this URL to Additional Boards Manager URLs and press OK.
https://raw.githubusercontent.com/eerimoq/simba-releases/master/arduino/avr/package_simba_avr_index.json
Open Tools -> Board: … -> Boards Manager… and type simba in the search box.
Click on Simba by Erik Moqivst version x.y.z and click Install and press Close.
Open Tools -> Board: … -> Boards Manager… and select one of the Simba boards in the list.
Now my setup was slightly different, I had an Arduino Nano fitted to a NANo_UNO shield adaptor and a Easy Module Shield fitted to that as well, this was so I can get access to the many onbaord components on that shield via my Nano.
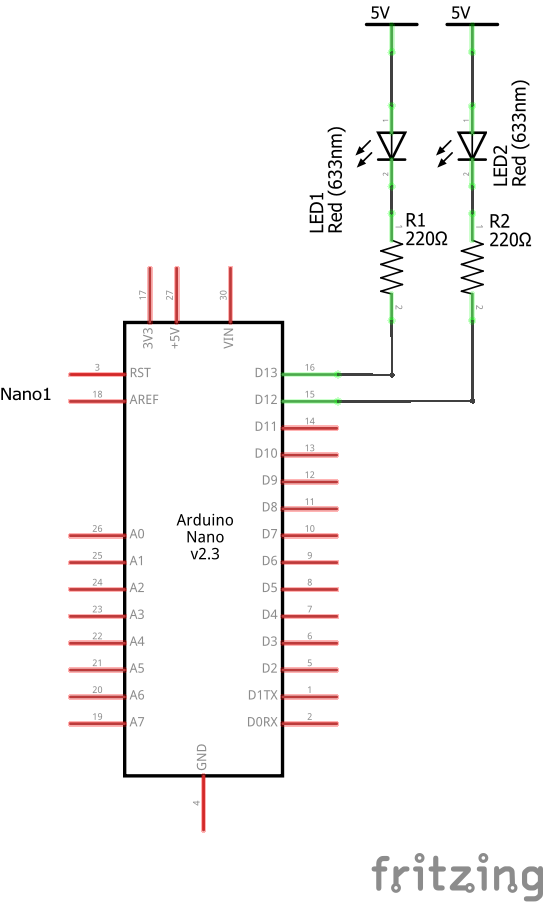
In this case basically we are using 2 LEDs connected to D12 and D13 and we will flash them on and off, so the schematic looks like this
Schematic
Code
[codesyntax lang=”cpp”]
#include "simba.h"

int main()
{
    struct pin_driver_t led1;
    struct pin_driver_t led2;
    /* Start the system. */
    sys_start();

    /* Initialize the LED pin as output and set its value to 1. */
    pin_init(&led1, &pin_d12_dev, PIN_OUTPUT);
    pin_init(&led2, &pin_d13_dev, PIN_OUTPUT);
    pin_write(&led1, 12);
    pin_write(&led2, 13);
    while (1) {
        /* Wait half a second. */
        thrd_sleep_ms(500);
        /* Toggle the LED on/off. */
        pin_toggle(&led1);
        thrd_sleep_ms(500);
        pin_toggle(&led2);
    }

    return (0);
}
[/codesyntax]
Upload the sketch and all going well, flashy led’s. I like the look of Simba, it will be something that I play about with.
