The Relay Shield features four high quality relays and provides NO/NC interfaces, four dynamic LED indicators to show the on/off state of each relay, and the standardized shield form factor to provide a smooth connection to Arduino compatible boards.
Product details
 Relay Shield v0.9b 5V 4-Channel Relay Module for Arduino – (Works with official Arduino Boards) – $9.73 Relay Shield is a small current signal control module can achieve single chip to control large power device Note: Please avoid the green terminal short-circuit by the housing as connecting with Arduino UNO main board Specification Power voltage: 4.75~5V; |
In this example we will show how to use one of the relays on the shield to control an LED by switching it on and off.
Here is a picture of the relay shield
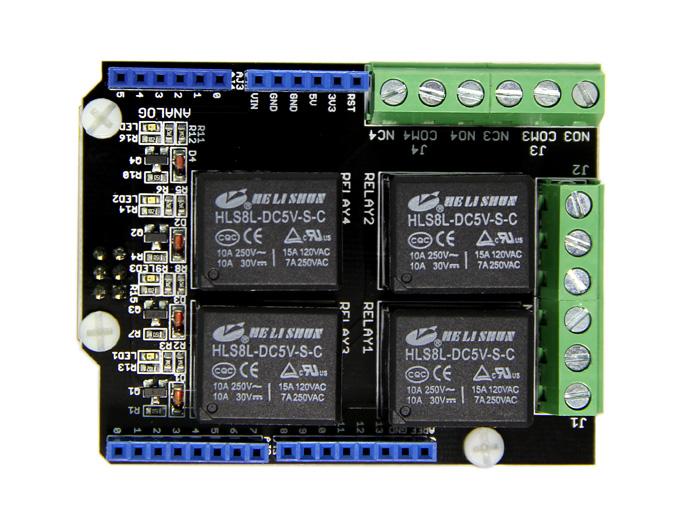
relay shield
J1 Interface/Terminal Pin Description:
COM1 (Common Pin) : The relay pin controlled from the digital pin.
NC1 (Normally Closed): This terminal will be connected to COM1 when the RELAY1 control pin (Digital 7 I/O pin) is set low and disconnected when the RELAY1 control pin is set high.
NO1 (Normally Open): This terminal will be connected to COM1 when the RELAY1 control pin (Digital 7 I/O pin) is set high and disconnected when the RELAY1 control pin is set low.
Schematic
Here is a simple picture showing how to connect the LED to the relay shield
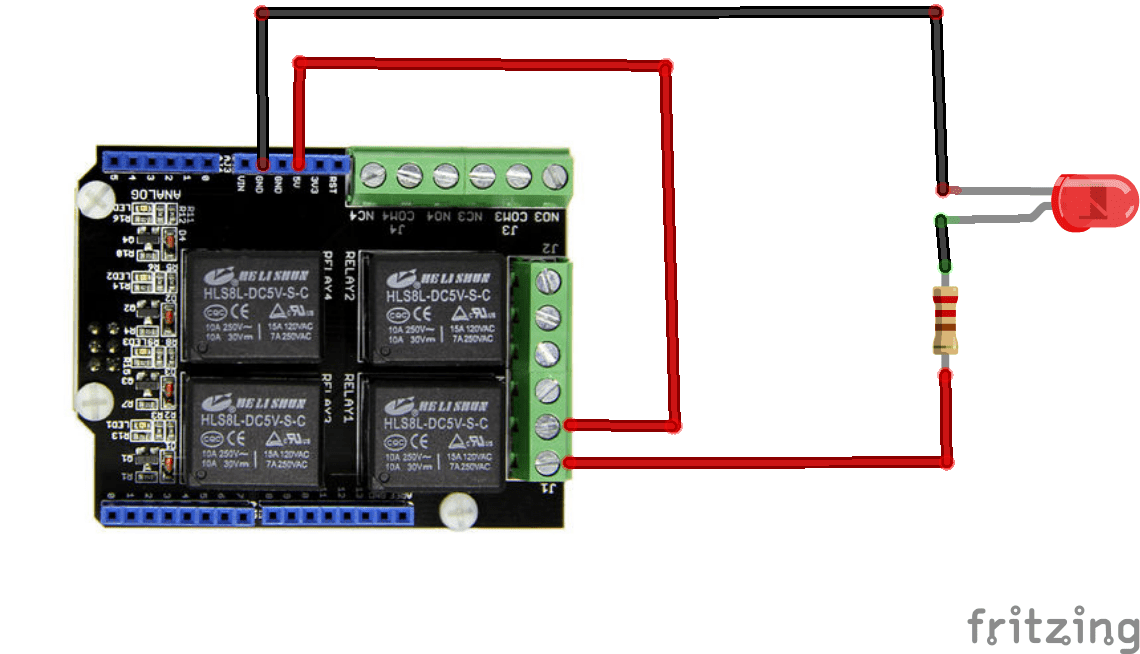
relay shield and LED
Code
No libraries required here
[codesyntax lang=”cpp”]
int RelayControl1 = 7;    // Digital Arduino Pin used to control the motor


void setup()
{
    pinMode(RelayControl1, OUTPUT);
}


void loop()
{
    digitalWrite(RelayControl1,HIGH);// NO1 and COM1 Connected (LED on)
    delay(1000); // wait 1000 milliseconds (1 second)
    digitalWrite(RelayControl1,LOW);// NO1 and COM1 Disconnected (LED off)
    delay(1000); // wait 1000 milliseconds (1 second)
}
[/codesyntax]
Links
Four Channel Relay Electronic 5V 4 Channel Relay Shield Module For Arduino
