The MAX7219 is a compact, serial input/output common-cathode display drivers that interface microprocessors (µPs) to 7-segment numeric LED displays of up to 8 digits, bar-graph displays, or 64 individual LEDs. Included on-chip are a BCD code-B decoder, multiplex scan circuitry, segment and digit drivers, and an 8×8 static RAM that stores each digit. Only one external resistor is required to set the segment current for all LEDs.
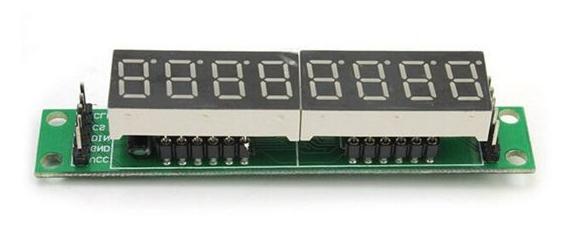
In this example we will use one of the MAX7219 modules with 7 segment displays that can be bought cheaply
These typically look like this
Connection
Vcc is connected to the VCC pin
Gnd is connected to the Gnd pin
pin 12 is connected to the DIN pin
pin 11 is connected to the CLK pin
pin 10 is connected to the CS pin
Code
This requires the LedControl library to be installed – https://github.com/wayoda/LedControl
[codesyntax lang=”cpp”]
#include "LedControl.h"

LedControl lc=LedControl(12,11,10,1);
// pin 12 is connected to the DIN pin
// pin 11 is connected to the CLK pin
// pin 10 is connected to the CS pin
// 1 as we are only using 1 MAX7219

void setup()
{
  // the zero refers to the MAX7219 number, it is zero for 1 chip
  lc.shutdown(0,false);// turn off power saving, enables display
  lc.setIntensity(0,8);// sets brightness (0~15 possible values)
  lc.clearDisplay(0);// clear screen
}

void loop()
{
  //numbers 7 to 0
  for (int a=0; a<8; a++)
  {
    lc.setDigit(0,a,a,false);
    delay(100);
  }
  delay(1000);
  //display number 8 on all segments
  for (int a=0; a<8; a++)
  {
    lc.setDigit(0,a,8,false);
    delay(100);
  }
  delay(1000);
  //
  for (int a=8; a>=0; a--)
  {
    lc.setDigit(0,a,a,false);
    delay(100);
  }
}
[/codesyntax]
Links
8 digit 7 segment digit LED display can cascade finished product MAX7219 module


