I decided to use Johnny-five (http://johnny-five.io/) , we were having a play about with Javascript. In this example I wanted see how easy it was to write something on an LCD, to be eact I would be using an LCD keypad shield
The process is as simple as
- Install Node.js (Prefer 4.2.1 LTS).
- Setup your board.
- Run:
npm install johnny-five
To setup your board you need to upload the StandardFirmata sketch to your Arduino. You can find this in Examples -> Firmata.
lets take a look at the LCD keypad shield, there are a couple of variations but here is the one that I use
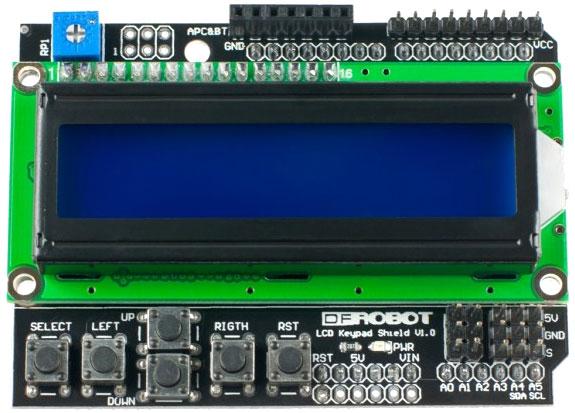
lcd keypad shield
The connections required for this example are as follows
// LCD pin name  RS  EN  DB4 DB5 DB6 DB7
// Arduino pin # 8    9   4   5   6   7
Code
In this code example I have set the com port of my Arduino to 5, I noticed that by default it would try and connect to the first com port 1 on my system and would not run, you will have to change this to the com port of your Arduino board
[codesyntax lang=”javascript”]
var five = require("johnny-five"),board, lcd;

var board = new five.Board({
  port: "COM5"
});

board.on("ready", function() {

  lcd = new five.LCD({
    // LCD pin name  RS  EN  DB4 DB5 DB6 DB7
    // Arduino pin # 8    9   4   5   6   7
    pins: [8, 9, 4, 5, 6, 7],
    backlight: 10,
    rows: 2,
    cols: 20

  });


  // Line 1: Arduino
  // Line 2: lcd example
  lcd.clear().print("Arduino");
  lcd.cursor(1, 0);
  lcd.print("lcd exammple");


  this.repl.inject({
    lcd: lcd
  });
});
[/codesyntax]
Save this as lcd.js in your Johnny-five directory, mine was located at C:\Users\MyName\node_modules\johnny-five.
Run the example from the command line by typing in the following
[codesyntax lang=”dos”]
node lcd.js
[/codesyntax]
Links
1PCS LCD Keypad Shield LCD1602 LCD 1602 Module Display For Arduino
