In this article we look at a pair of modules that can be used for communication between 2 Arduino’s. These are a 315Mhz transmitter and receiver module, they are very similar to the 433Mhz modules we looked at in a previous article – the only difference is that they use a different pairing frequency. They are an excellent low cost solution for communication coming in at only $3.20 for a pair of these
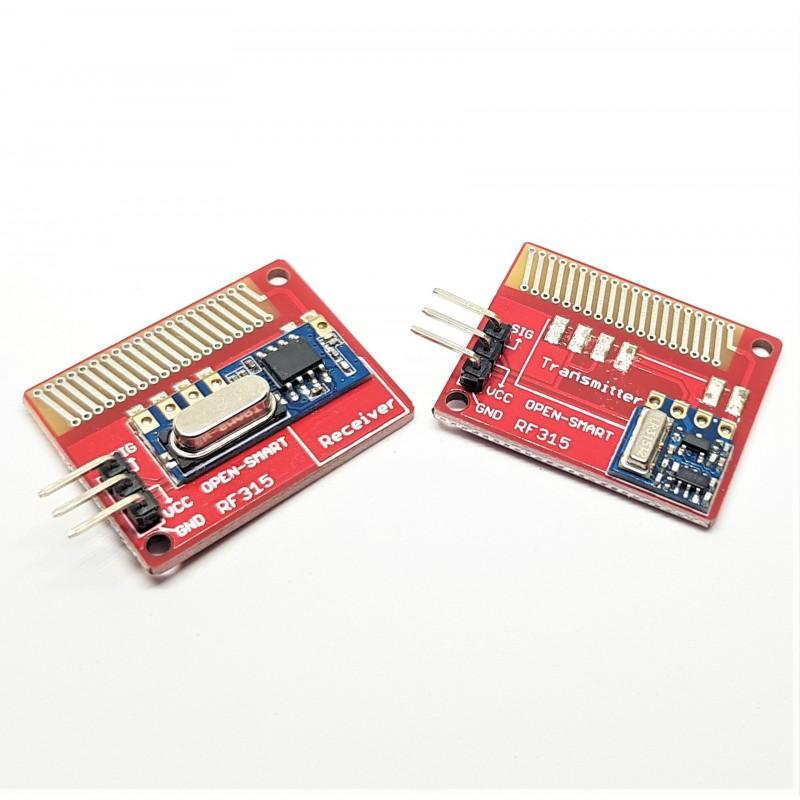
The kit includes one pair of transmitter and receiver modules and one pair of spring antennas for increasing the communication distance. And the frequency is 315MHz. It is very popular for remote control systems, such as wireless doorbell, remote control rolling gates, smart car, smart home, etc.
About transmitter module (onboard square module)
– Compatible with Arduino
– Working voltage: 4 – 12VDC
– Working current: 40mA
– Transmit power: 27dBm@12V (large power)
– Working frequency: 315MHz
– Transfer rate: 4.8kbps (max)
– Transmission distance: When supply poower is 5V, the open area transmission distance can be increased to 150 meters. The supply voltage is larger, the transmission distance farther.
– Antenna: Onboard 315MHz dedicated PCB Antenna.
About receiver module (rectangle shape):
– Compatible with Arduino
– Arduino Library: VirtualWire
– Operating voltage: 2 – 5.5VDC
– Working frequency: 315MHz
– Working Current: 2mA
– Sensitivity: -110db
– Antenna: Onboard 315MHz dedicated PCB Antenna
Parts
You will need 2 Arduino’s – one for the transmitter and one to be the receiver. I used 2 Arduino Uno’s in testing
| Name | Link |
| Arduino UNO | Arduino UNO R3 |
| 315mhz modules | OPEN-SMART Long Range 315MHz RF Wireless Transceiver Kit |
| Connecting area | Cable Dupont Jumper Wire Dupont 30CM |
Code
The code needs the virtualwire library to be installed, we have this in the download below
Here is the receiver part of the code
[codesyntax lang=”cpp”]
#include <VirtualWire.h>
int RF_RX_PIN = 11;//connect the sent module to D11 to use
//you can change it to the idle port you want.
void setup()
{
Serial.begin(9600);
Serial.println(“setup”);
vw_set_rx_pin(RF_RX_PIN); // Setup receive pin.
vw_setup(2000); // Transmission speed in bits per second.
vw_rx_start(); // Start the PLL receiver.
}
void loop()
{
String comdata = “”;
uint8_t buf[VW_MAX_MESSAGE_LEN];
uint8_t buflen = VW_MAX_MESSAGE_LEN;
if(vw_get_message(buf, &buflen)) // non-blocking I/O
{
int i;
// Message with a good checksum received, dump HEX
Serial.print(“Got: “);
for(i = 0; i < buflen; ++i)
{
comdata += (char)buf[i];
//Serial.print(” “);
//Serial.print(buf[i]);
}
Serial.print(comdata);
Serial.println(“”);
}
}
[/codesyntax]
And now for the transmit test example
[codesyntax lang=”cpp”]
#include <VirtualWire.h>
int RF_TX_PIN = 12;//connect the transmit module to D12
void setup()
{
Serial.begin(19200);
vw_set_tx_pin(RF_TX_PIN); // Setup transmit pin
vw_setup(2000); // Transmission speed in bits per second.
}
unsigned char buffer[64]; // buffer array for data recieve over serial port
int count=0; // counter for buffer array
void loop()
{
if (Serial.available()) // if date is comming from softwareserial port ==> data is comming from gprs shield
{
while(Serial.available()) // reading data into char array
{
buffer[count++]=Serial.read(); // writing data into array
if(count == 64)break;
}
vw_send(buffer, count); // Send ‘hello’ every 400ms.
clearBufferArray(); // call clearBufferArray function to clear the storaged data from the array
count = 0;
}
// const char *msg = “hello”;
// vw_send((uint8_t *)msg, strlen(msg)); // Send ‘hello’ every 400ms.
delay(400);
}
void clearBufferArray() // function to clear buffer array
{
for (int i=0; i<count;i++)
{ buffer[i]=NULL;} // clear all index of array with command NULL
}
[/codesyntax]
